- Open the iTunes application on your PC or Mac.
- Select a song in your iTunes Music Library and click on it.
- Go to Preferences (On a Mac, this is under the iTunes drop down menu. On a PC, iTunes Version 11, this is under the square icon on the top left of your iTunes window).
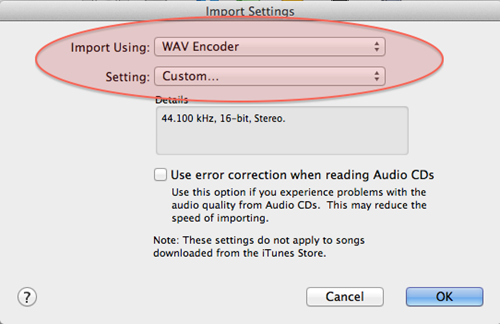
- Once you’ve clicked Preferences ,make sure you are on the General tab. Go down to where it says Import Settings.
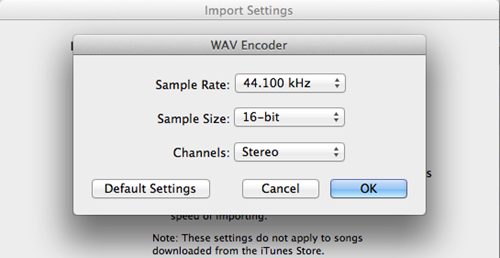
- Change Import Using to WAV Encoder . Then click to change Setting to Custom and a new window will open.
- In the Custom window, change the Sample Rate to 44.1 kHz and Sample Size to 16 bit . Make sureChannels says Stereo and Stereo Mode says Normal.
- With your song title(s) still highlighted right click and select Create WAV version. Your song(s) will immediately begin converting. If you have a newer version of iTunes you may need to go to File , click Convert and “Create WAV Version”.
- Once the song has finished converting, you will see that the highlighted song(s) is the old version. We recommend you drag the newly converted file(s) (not highlighted) to a folder on your desktop directly from the iTunes library so you will be able to find it later.
Note that you can use this also to rip CD:s with the settings configured, iTunes automatically detects when you insert a CD and shows the import dialog.
|


|


